Getting your website online starts with one step: signing up for hosting. If you have chosen Hostinger, you have picked one of the most affordable and beginner-friendly hosts available. The signup page can still feel a little confusing the first time, with its plans, billing terms, and options, so this guide walks you through exactly how to sign up for Hostinger in 2026, step by step, so you pick the right plan, claim your free domain, and get online without any guesswork.
I have done this on real projects, so this is the actual process, not theory. The whole thing takes about five minutes. By the end you will have an active hosting account, your domain, and be ready to install WordPress.
⚡ Quick Answer
To sign up for Hostinger: go to Hostinger, choose a hosting plan (Premium suits most beginners), select your billing term (longer terms cost less per month), create your account with email or Google, enter payment, then claim your free domain and install WordPress. The whole process takes about 5 minutes.
A quick note on what you get before we start. Hostinger is known for affordable, reliable hosting, with plans starting at just a few dollars per month. It includes a free domain for the first year on annual plans, free SSL, free email, and a beginner-friendly control panel called hPanel. It runs on fast LiteSpeed servers and comes with a 30-day money-back guarantee, so you can sign up with confidence. Now let us get you set up.
Step 1: Go to the Hostinger Website
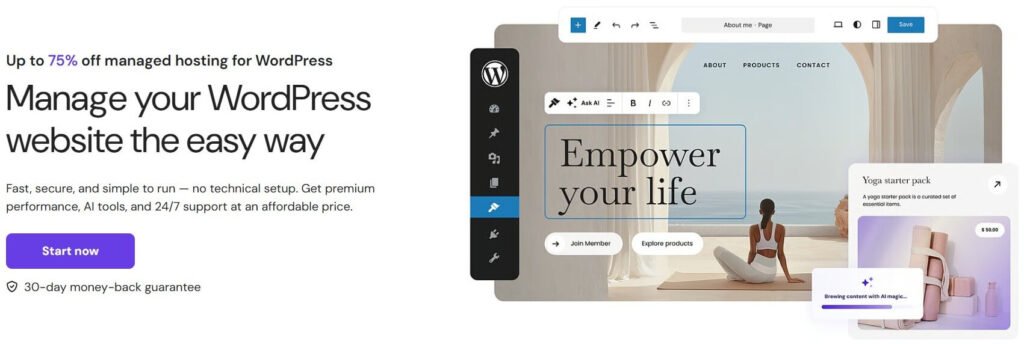
Start by heading to Hostinger through the button below. Using this link applies the current discount automatically, so you get the lowest available price plus a free domain. It opens the Hostinger site where you will pick your plan.
Discount applied automatically through this link · 30-day money-back guarantee
Step 2: Choose Your Hosting Plan
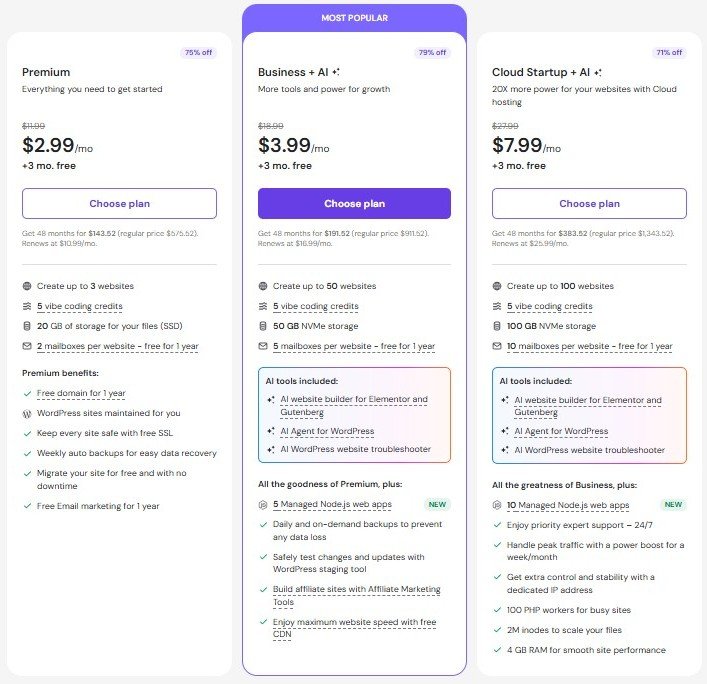
Click on start now or scroll down to see hosting plans. Hostinger offers a few shared hosting plans. For most beginners, the choice comes down to the entry plans. Here is the honest breakdown so you pick the right one.
Premium BEST FOR BEGINNERS
The best starting point for most people. Includes a free domain, enough storage for a real website, and room to grow. The right pick for a first site, a blog, or a portfolio.
Business + AI
Adds more storage, faster NVMe performance, and daily backups. Worth it if you are building an online store or expect more traffic.
Cloud Startup + AI
For high-traffic sites that have outgrown shared hosting, with extra power and a dedicated IP. More than a brand new site needs.
For your first website, the Premium plan is the sweet spot of price and features. You can always upgrade later as your site grows. Click to select your plan and continue.
Honest tip: Do not pay for a plan built for traffic you do not have yet. A new site runs perfectly on the Premium plan. Start there and upgrade only when your site actually grows. Hostinger lets you upgrade anytime.
Step 3: Select Your Billing Term
After clicking Choose Plan, you land on the cart page. There are a few things here, so let us go through them one by one so nothing trips you up.
Set Your Billing Period
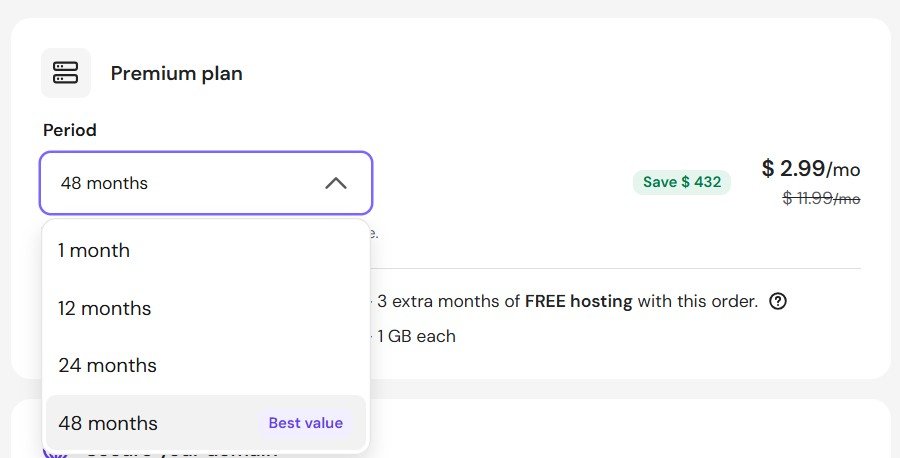
At the top, use the Period dropdown to choose how long you want to sign up for. You get four options: 1 month, 12 months, 24 months, or 48 months. This choice matters more than it looks, because it changes both what you pay and what you get.
The 1 month option is the trap most beginners fall into. It looks cheaper because the upfront number is smaller, but you pay the full standard rate every month with no discount, and it does not include the free domain. So you end up paying more per month and then buying a domain separately on top, which usually costs another $10 to $15 for the year.
The longer terms work the opposite way. Hostinger charges the full period upfront, so the payment is larger, but the monthly rate drops sharply and the free domain is included. Run the numbers over a single year and the gap is obvious. Twelve months at the discounted rate plus a free domain will normally cost less in total than twelve separate months at the standard rate plus a domain you paid for yourself.
My honest advice: choose 12 months at minimum. It is the point where the discount and the free domain both kick in, and a year is long enough to know whether your website is something you want to keep. The 48 month term gives the lowest monthly cost of all if you are confident about the project, but you are committing four years upfront, so only take it if you are certain.
Watch the renewal price: The low price you see is the introductory rate for your first term. When it renews, it goes up to the standard rate, which is significantly higher, so check the current renewal price on the Hostinger site before you commit. This is normal for budget hosts. A longer term locks in the low price for longer before renewal.
Choose Your Free Domain
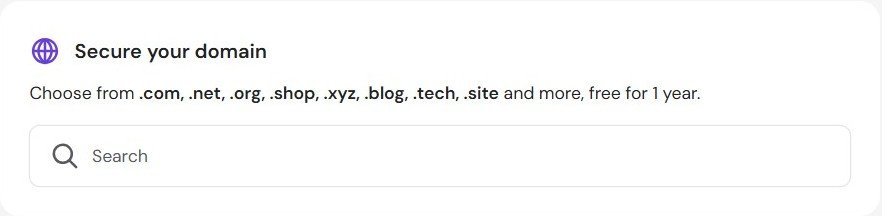
Below the plan, you will see a “Secure your domain” box where you can search for a free domain name (.com, .net, .org, and more are free for the first year on annual plans). You can search and pick your domain here, or skip it for now and set it up later. We cover claiming your domain in more detail in the next step.
Skip the Email Marketing Add-On (Optional)
You may also see an optional add-on called Hostinger Reach for email marketing. This is not required to get your website online. If you are just starting out, you can safely skip it and add it later if you ever need it. Only add paid extras you actually need right now.
Apply a Coupon Code
In the order summary on the right, you will see a “Have a coupon code?” link. Skip it, since the discount through this guide’s link is already applied. When everything looks right, click Continue.
Step 4: Create Your Hostinger Account
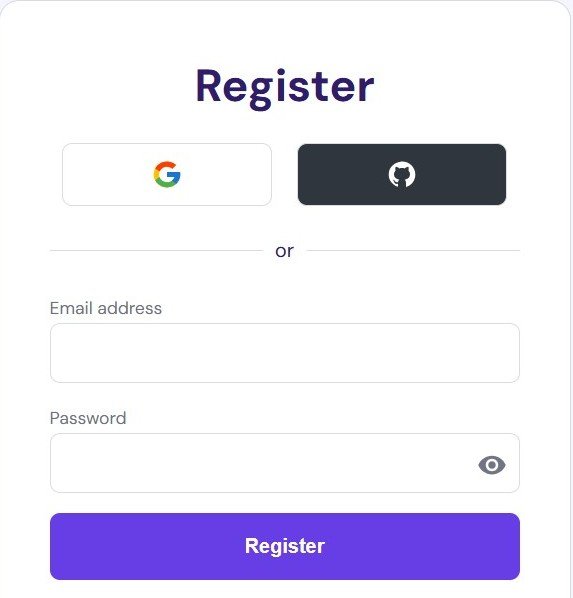
Next you create your account. Hostinger keeps this simple. You can sign up with your email address, or use your Google account for a faster setup. If you use email, enter your email and create a password.
One nice thing about Hostinger is that it does not ask for a lot of personal information at this stage. Just the essentials to create your account and process payment.
Step 5: Enter Your Billing Details
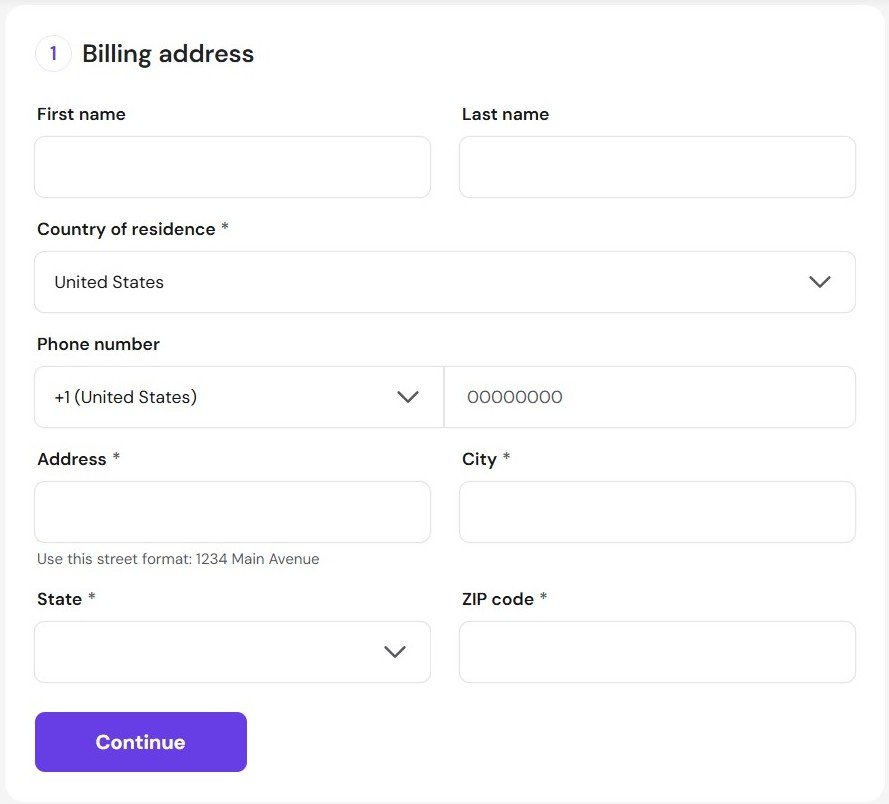
Now enter your billing address. This is standard information: your name, address, and country. Hostinger needs this for billing and tax purposes. Fill in the fields accurately and click continue.
Step 6: Choose Your Payment Method and Pay
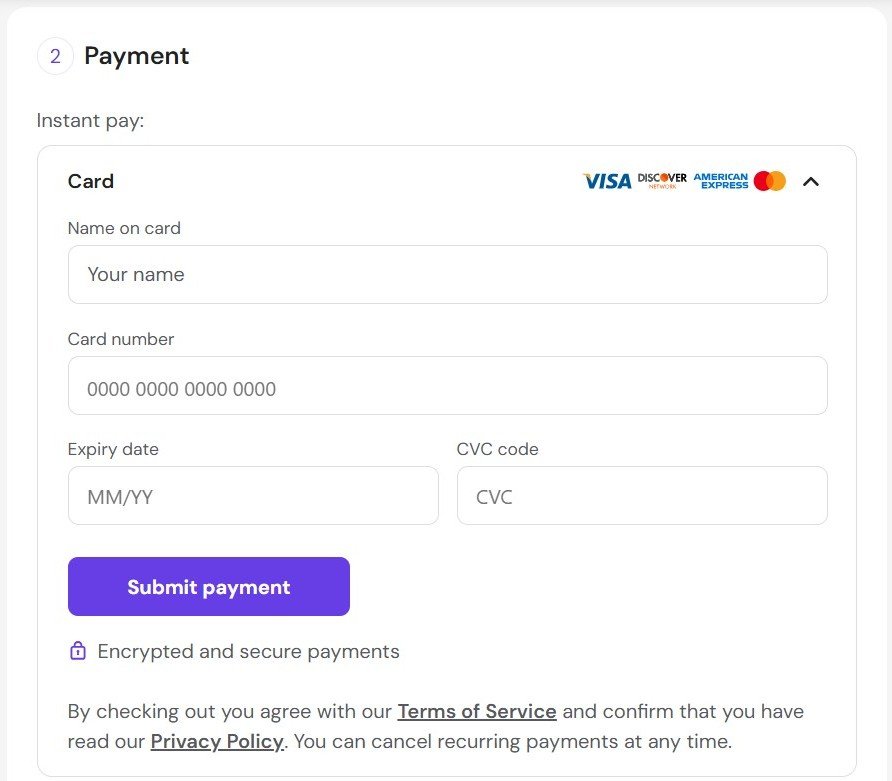
Finally, choose how you want to pay. Hostinger accepts a wide range of payment methods, which helps no matter where you are in the world.
Credit and debit cards (Visa, MasterCard, American Express, and more)
PayPal
Google Pay and Apple Pay
Cryptocurrency, including Bitcoin, in some regions
Select your method, enter the details, and complete the payment. Hostinger does not pre-select paid add-ons or sneak extras into your cart, so the amount you see is what you pay. Once your payment goes through, your hosting account is active.
💳
💡 Good to Know
In addition to card payments, country-specific alternative payment methods are also available.
Step 7: Claim Your Free Domain
After payment, Hostinger walks you through setting up your account. If your plan includes a free domain (annual plans and longer do), you will be prompted to claim it. Search for the domain name you want and, if it is available, register it for free. If you already chose earlier after selecting plan, this option will not come up.
If you already own a domain from another registrar, you can use that instead by pointing it to Hostinger. And if you are not ready to choose a domain yet, you can use a temporary one and set the real domain later.
You’re Ready to Install WordPress
With your account active and your domain set, the last step is installing WordPress so you can actually build your site. Hostinger makes this easy with a one-click installer built right into hPanel, and your account is now ready for it.
I cover the entire WordPress installation, step by step with screenshots, in the next guide: how to install WordPress on Hostinger. Follow that next and you will have a live WordPress site in a couple more minutes.
Next Step
Install WordPress on Hostinger
Your hosting is ready. Now install WordPress in about 2 minutes with Hostinger’s one-click installer and start building your site.
If your card is declined, try a different payment method like PayPal, or check with your bank, since international transactions are sometimes blocked by default. Hostinger accepts many payment types, so there is usually an option that works.
I Did Not Get the Free Domain
The free domain is included on annual plans (12 months and longer), not the 1-month plan. If you chose monthly billing, that is why. Also make sure you completed the domain claim step during onboarding.
Frequently Asked Questions
How much does it cost to sign up for Hostinger?
Hostinger’s shared hosting starts at a few dollars per month on its introductory pricing, with the lowest monthly rate on the longest (48-month) term. The exact price changes with promotions, and tax is added at checkout. Always check the current price on the Hostinger site, since it updates regularly.
Does Hostinger include a free domain?
Yes, Hostinger includes a free domain for the first year on annual plans (12 months and longer). The 1-month plan does not include a free domain. After the first year, the domain renews at its standard rate.
Which Hostinger plan is best for beginners?
The Premium plan is the best choice for most beginners. It includes a free domain, enough storage and resources for a new website, and room to grow. The Business plan is worth it if you are building an online store or expect higher traffic. You can upgrade anytime.
Can I pay monthly instead of for a full year?
Yes, Hostinger offers a 1-month billing option, but it is the most expensive per month and does not include the free domain. For the best value, the 12-month or longer terms are recommended. You pay the full term amount upfront.
Is Hostinger safe to enter my payment details?
Yes. Hostinger is an established, reputable hosting company serving millions of users worldwide. Its checkout is secure and it accepts trusted payment methods including major cards, PayPal, and Apple/Google Pay. It also offers a 30-day money-back guarantee.
What payment methods does Hostinger accept?
Hostinger accepts major credit and debit cards (Visa, MasterCard, American Express), PayPal, Google Pay, Apple Pay, and cryptocurrency such as Bitcoin in some regions. This wide range makes it easy to sign up from almost anywhere in the world.
Can I get a refund if I change my mind?
Yes. Hostinger offers a 30-day money-back guarantee on its hosting plans, so you can try it risk-free. Note that some items like domain registration are typically non-refundable. Check Hostinger’s refund policy for the full terms.
What do I do after signing up for Hostinger?
After signing up, claim your free domain, then install WordPress using Hostinger’s one-click installer in hPanel. From there you choose a theme, add plugins, and build your site. Follow our step-by-step guide on installing WordPress on Hostinger to continue.
You’re Set Up and Ready to Build
That is the full Hostinger signup process. You picked a plan, chose the right billing term, created your account, paid securely, and claimed your free domain. Your hosting is now active and waiting.
The next step is installing WordPress so you can actually build your website. Follow my guide on how to install WordPress on Hostinger to continue, and you will have a live site in minutes.
MR
Muhammad Rizwan ✓
FOUNDER, WPOLC.COM
Riz writes step-by-step WordPress and hosting tutorials for complete beginners. He runs wpolc.com to help people build their first website without the overwhelm or wasted money.